How to Add Items into a Shop GUI
Download – ShopGUI Script
How To – Add Items into a ShopGUI in Roblox Studio
What’s up everyone welcome to buzzygames, my name is BuzzyGamesBeth and today I’ll be teaching you how to add items into your shopGUI!
- I have this gun that I pulled off the toolbox, i’m going to go ahead and drag that inside of serverstorage.
- Next up inside of replicatedstorage we’re going to go ahead and add a remote event. Now inside of this remote event i’m going to go ahead and rename it to gunevent. Feel free to name it whatever you would like just remember it so because we will be referencing it later in our script.
- Alrighty back into our startergui head over to our open and close screengui and in our frame we’re going to go ahead and add a text button. Now this text button is going to prompt us whatever it is that you want to buy inside of your shopGUI. In my case it’s going to be the gun!
- Now of course i’m going to go ahead and add a uicorner for my text button and then renaming this button to “gun” because I will be referencing this inside of our script in justa second and then of course go ahead and customize this text button to however you want it to look like.
- Go ahead and add an image label to show what exactly it is that you’re trying to sell as well as a text label that’s going to show how much this item is going to cost. In this case i’m going to go ahead and make this gun worth 200 points!
- So points is by leaderstats value but if you have money, if you have cash whatever your leaderstats value is, you know we’ll be sending that in just a second.
- Now inside of our gun text button, let’s go ahead and add a localscript and inside of this localscript we have a function that anytime a player clicks on this gun textbutton it’s going to fire the remote event which we named to “gunevent”. Now remember if you renamed your remote event to something else, make sure toreference that correctly inside of this script!
- Before we move on just make sure that you guys actually have a leaderstats folder inside of your serverscriptservice so cash or money any value that you have we’ll be making sure to reference that inside of our script in just a second.
- If you guys can see that where it says “numbervalue” right? So the name of my value is = to points. Now it’s going to be different for everyone some people can have it as cash or money, mine is points!
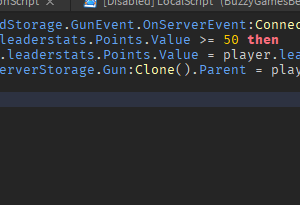
- Inside of serverscriptservice we’re going to go ahead and add a script! Inside of this script we have it so that any time the remoteevent which is gunevent for me is triggered then it’s going to check the leaderstats value of our player and see if our points value is greater than or equal to 50. If it’s less than that, the player won’t be able to get the gun, but if it is then what it’s going to do is deduct 50 points from our player and then the gun is going to be cloned which we placed inside of serverstorage and then place it inside of our player’s backpack!
- One thing to note is that where it says leaderstats.points.value make sure that the where it says “points” reflects the correct name of your “numbervalue”. So if it’s cash then it should be “leaderstats.cash.value”, if it’s money then it should be “leaderstats.money.value” and so on and so forth!
- Okay so since that is finished make sure to go ahead and untick visible in your frame because we don’t want to see it once we hop inside of our game and then of course let’s go ahead and test out our game! So you’ll see that I have 200 points automatically, i’m going to open up my GUI and get the gun. I’m going to click the gun and there you go! You see how that my points deducted by 50 and now I now havea gun inside of my backpack!


