How to Open a Door With a Keycard
Download – Door Script and Model
How To – Open a Door With a Keycard in Roblox Studio
Shout out to our video content creator @taintedazazel for this tutorial on how to create a door that requires a keycard to open!
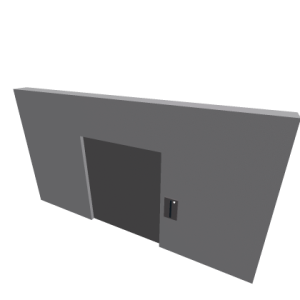
- First and foremost, inside our workspace go ahead and spawn in a part. This is going to be our door, go ahead and rename that part to “door” and then for aesthetic reasons we’re just going to go ahead and decorate the surroundings of our door.
- Next up we’re going to go ahead and create the little keycard area where we have to scan this keypart with our card to open the door.
- It’s coming along! Now inside of that part that I just highlighted, this is going to be my key part that requires some kind of keycard to open this door. Let’s go ahead and group all of our parts inside of a model and inside of our key part we’re going to add a script
- All right so inside of this script we have multiple variables which references the tweenservice, our model, our keypart door, and most importantly our open and close tween information! In our variable where it says local open = tweeninfo.new which is basically setting the style of our tween animation and how many seconds we want this tween animation to occur, for the open and close! We also have a debounce.
- Now for our function we’re going to go ahead and create a keypart.touch:connect(function(hit)) and hit is our parameter. Now if hit.parent.name is equal to keycard, so keycard is going to be the part that we’ll create in just a second. So if a player is holding a keycard and it’s coming into contact with this keypart, then the door is going to open to this certain position.
- Right now we’re going to go ahead and set the position of this and in order to get the position of our door to open to where we want it to open, we’re going to go ahead and head over to our workspace. What you want to do is go ahead and move our door part up because that’s where we want our door to go and head over to where it says position and you see where it says on the “y” coordinates where it says 10.1 take a note of your “y” coordinates and then take a note of the coordinates of when your door is closed. For me it’s 3.4 so inside of the command line i’m going to print 10.1 – 3.4 and it’s going to give me the value of when the door is open – which is 6.7.
- I’m going to go ahead and write 6.7 here so (0, 6.7, 0) and then it’s going to play the open tweening information. We’re gonna wait a few seconds and then we’re gonna go ahead and play the close animation of our door and then we’re gonna go ahead and set the debounce to false.
- One quick fix in the tweeninfo for our close variable i’m just changing it to sine and then instead of “in” change it to “InOut”.
- To create our keycard, go ahead and feel free to use any fancy keycard that you have, for me i’m just going to use this simple part! Now remember when you create a tool rename your part to “Handle” and then make sure to rename your tool to “KeyCard”. Remember how in our script we said keycard make sure it matches the same as the script!
- Go ahead and drag that (tool) inside of starterpack. Cool so let’s go ahead and test out our keycard with our door!
- So it definitely works out but let’s go ahead and spice it up a bit and create a little indicator of when the card is ready to be scanned again!
- Hop back inside of our workspace and inside of our keypart, I duplicated a keypart and let’s go ahead and rename that to active and then we’re gonna go ahead and change the size of our part. Put it in around like the top corner of our key part area!
- Sweet so let’s go ahead and hop back inside of our script and we’re going to go ahead and create a variable to reference our active part. So local active = model.active – very simple! All right so we’re going to set it so that anytime the door is not ready to be opened we’re gonna set the brick color of it to “really red” and then once the door is ready to be opened, we’re gonna set the brickcolor of it to “lime green”


